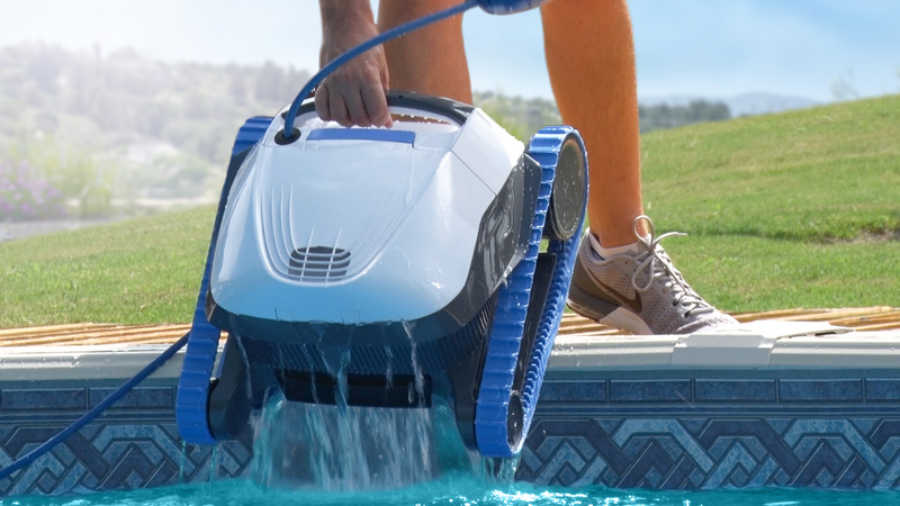
Pool maintenance becomes significantly easier with a properly functioning Dolphin robotic cleaner. According to recent industry data, pool cleaners with original manufacturer parts last up to 40% longer than those repaired with aftermarket components. I’ve spent years working with these machines and can confirm that using genuine Dolphin replacement parts isn’t just about maintaining warranty coverage—it’s about ensuring optimal performance and extending the lifespan of your investment. Whether you’re troubleshooting an issue or performing routine maintenance, this guide will help you identify the exact authentic parts your specific Dolphin model requires.
Essential Motor Components for Dolphin Pool Cleaners
Motor Assembly for Nautilus CC Plus and Related Models
The 9995388‑EX motor assembly stands as a critical component for several popular Dolphin models including the Nautilus CC Plus, M200/M400/M500 series, and DX3/DX4/DX6 cleaners. This genuine replacement part ensures optimal performance and maintains the manufacturer’s specifications for proper water flow and suction power. The assembly is engineered to fit perfectly within these specific models, eliminating compatibility concerns that might arise with third-party alternatives.
S200/S300 Robot Motor Units
For owners of the Dolphin S200 and S300 robot cleaners, the 9995387‑ASSY motor unit provides an exact replacement that matches the original equipment. This official motor unit is designed to deliver consistent power while maintaining energy efficiency—critical factors in extending the operational life of your pool cleaner while keeping electricity costs manageable.
When to Replace vs. Repair
Several warning signs indicate when a motor replacement becomes necessary. Unusual noises during operation, significant decreases in cleaning efficiency, or the cleaner failing to move properly across the pool floor all suggest motor issues. Additionally, if the unit struggles to climb walls that it previously handled with ease, the motor may be operating at reduced capacity.
Installation Best Practices
When installing a replacement motor, ensure all electrical connections are completely dry before assembly. Verify that all gaskets and seals are properly seated to prevent water intrusion. Follow the manufacturer’s torque specifications when tightening fasteners to avoid damaging the housing or creating leak points. After installation, test the unit in shallow water before full deployment to confirm proper operation.
Availability and Pricing Considerations
Motor assemblies typically represent one of the more significant investments in maintaining a Dolphin cleaner. The 9995388‑EX assembly generally retails in the $300-400 range, while the 9995387‑ASSY unit for S-series robots may be found at similar price points. Authorized dealers often provide warranty coverage that unauthorized resellers cannot match, making the source of your replacement parts an important consideration.
Power Supply Units: The Heart of Your Dolphin Cleaner
Basic Power Supply for Legacy Models
The 9995670‑US‑ASSY power supply unit provides basic “on/off only” functionality for older Dolphin models including the Advantage, Deluxe 3, original Nautilus, DX5, and Saturn. This compact unit weighs approximately 4 pounds with dimensions of roughly 1 × 1 × 1 inches for the main body. Its straightforward design prioritizes reliability for pools that don’t require advanced scheduling features.
Standard 180W Power Unit Features
Similar in capability to the basic model, the 9995675‑US‑ASSY 180W power unit provides consistent power delivery to compatible Dolphin cleaners. Priced around $299.99, this unit represents a substantial investment in maintaining your pool cleaning system. The standardized output ensures that your cleaner operates within design parameters, preventing potential damage from power fluctuations.
Advanced Weekly-Timer Functionality
For pool owners seeking greater automation, the 9995678‑US‑ASSY power supply incorporates weekly timer capabilities. This advanced unit allows programming of cleaning schedules throughout the week, enabling “set and forget” operation that aligns with your pool maintenance needs. This functionality is particularly valuable for vacation homes or properties with consistent usage patterns.
Troubleshooting Before Replacement
Before investing in a new power supply, check for simple issues that may mimic power unit failure. Verify that the outlet provides proper voltage, inspect the power cord for damage, and check all connections for corrosion or looseness. Sometimes, a reset by disconnecting power for several minutes will resolve electronic glitches without requiring replacement.
Connection and Maintenance Guidelines
To maximize power supply longevity, install the unit in a sheltered location away from direct sunlight, rain, and pool splash zones. Maintain at least 12 inches of clearance around the unit for proper ventilation. When connecting cables, avoid tight bends that can stress internal wiring. Periodically inspect connection points for signs of heat damage or corrosion, especially in humid environments.
Critical Impeller and Climbing Components
Impeller and Screw Assembly Details
The 9995266‑R1 black impeller and screw assembly serves as the heart of the water propulsion system in many Dolphin models, including the Nautilus CC/Plus, Premier, M200, and DX5S/DX6. This genuine part ensures proper water flow through the filtration system while providing the thrust needed for movement. The precision-engineered impeller blades are designed to maximize efficiency while minimizing noise during operation.
Climbing Ring Performance Factors
The 6101611‑R4 package includes four notched white climbing rings that significantly impact the cleaner’s ability to adhere to vertical surfaces. These specialized rings provide the necessary traction for models like the M200/M400/M500 and Nautilus CC to effectively clean wall surfaces. The notched design creates optimal water flow patterns that enhance the vacuum effect against vertical surfaces.
Identifying Component Wear
Impeller wear typically manifests as reduced cleaning efficiency or difficulty moving across the pool floor. Visual inspection may reveal cracked, bent, or broken blades. For climbing rings, excessive wear appears as smoothed surfaces, tears, or flattened areas that reduce traction. If your Dolphin struggles to climb walls it previously handled easily, inspect these components immediately.
Replacement Process Guidance
To replace the impeller, first disconnect all power sources and remove the main cover. Locate the impeller housing, typically behind the filter basket area. Remove any retaining screws and carefully extract the old impeller. When installing the new 9995266‑R1, ensure proper alignment and avoid overtightening the screw, which could crack the plastic components. For climbing rings, remove the old units by sliding them off the drive tube, then install the new 6101611‑R4 rings with the notched side facing outward.
Impact on Cleaning Efficiency
Properly functioning impellers and climbing rings dramatically affect overall cleaning performance. The impeller determines water flow through the filter system and propulsion power, directly impacting both movement and debris collection. Meanwhile, the climbing rings determine the vertical cleaning range and effectiveness, potentially limiting cleaning to just the floor if they’re worn or damaged.
Maximizing Your Dolphin’s Lifespan
Using genuine Dolphin replacement parts isn’t just about maintaining performance—it’s about protecting your investment. Throughout my years working with these machines, I’ve seen firsthand how authentic components consistently outperform aftermarket alternatives. By following the recommendations in this guide, you’ll not only keep your pool sparkling clean but also avoid the frustration and expense of premature replacement. Remember that your Dolphin cleaner is a sophisticated piece of equipment deserving of the components it was designed to use. When you invest in genuine parts, you’re investing in peace of mind and continued excellence in pool maintenance.
Leave a Reply